But before u can smallow my guide, you need to know a few things.
Let's get started, we need to add a new skin to some kind of mount that already exists in the game.
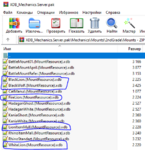
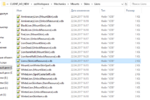
Let's take the lion 2ndGrade as an example, we need to find the MountResourse files responsible for it. Its location in the game is the same as on the server (I mean the internal path of the pak file).
Location on server = SERVER_AO\game\data\Packs\XDB_Mechanics.Server.pak\Mechanics\Mounts\2ndGrade\Mounts
Here we see 5 different lion mounts, let's take FireLion as an example.
If we open this file, we will see such lines:
So, "basicScin" is responsible for the basic skin of the mount, which is issued after activating the item of the mount. And "alternativeSkins" are responsible for the skins we can get on our mount.
It is in "alternativeSkins" that we need to add our new skin.
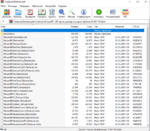
Because in xdb files mountresource most often refers to SkinListResourse which doesn't work on version 4.0 (at least for me). We will have to find it in the folder with new xdb from version 7.0 or 8.0.
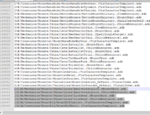
Opening it and comparing it with the original, we will find the skins we need.
The last two lines are exactly what we need. We add them to the server and client parts of MounResource and in the end we get something like this.
- Even if you follow the guide, you have to figure out a lot on your own. I explain with an example of how I did it. If you have any suggestions on how to supplement the guide or correct it, write me a pm.
- This guide only applies to mount skins, but most likely applies to the mounts themselves as well, since I have not yet reached the point of adding the mounts themselves (like a wasp or a fox).
- You need to understand that for the correct display of the mount skin, we need to trace all the links to which the files point. If there are no files on the link, then use the 1 point described above.
- Each xdb file is a spoon or fork, and each bin file is soup or spaghetti. You have to decide what to sip from the plate in a particular case yourself.
- There is such a thing as compatibility, that is, taking the xdb file version 7.0 and the bin file version 11.0, there is a possibility that the xdb file for 11.0 has been rewritten. And old xdb loses bin file compatibility.
- You need to decide for yourself which files should be indexed and which shouldn't. As well as deciding what to write in xdb, which is absent on the server side, but must be indexed in both the client and the server.
- You need to be aware of which files are already in packbin and which ones need to be added or replaced.
- Following everything that I have described in these paragraphs, I do not advise anyone who not related to programming or not familiar with server-client architecture to spend their time trying to reinvent the wheel. This is a job for Dungeon Master's only, not slave's.
- I want to add to the previous point, before you waste someone else's time asking or spamming on discord, think with your head. And look for the answer in the early posts, maybe you will find it there.
- Text editor (I use notepad ++)
- Unpacked xdb files 7.0 or 8.0
- Bin files of new versions of the mounts
- Workable repacker
- Server and client (4.0)
- Indexer (or you can get by with manual work)
- ZipPacker
- You must have some experience in sadomasochism
Let's get started, we need to add a new skin to some kind of mount that already exists in the game.
Let's take the lion 2ndGrade as an example, we need to find the MountResourse files responsible for it. Its location in the game is the same as on the server (I mean the internal path of the pak file).
Location on server = SERVER_AO\game\data\Packs\XDB_Mechanics.Server.pak\Mechanics\Mounts\2ndGrade\Mounts
Here we see 5 different lion mounts, let's take FireLion as an example.
If we open this file, we will see such lines:
XML:
<basicSkin href="/Mechanics/Mounts/Skins/Lions/FireLion.(MountSkin).xdb#xpointer(/gameMechanics.constructor.schemes.mount.MountSkin)" />
    <alternativeSkins>
        <Item href="/Mechanics/Mounts/Skins/Lions/BlackLion.(MountSkin).xdb#xpointer(/gameMechanics.constructor.schemes.mount.MountSkin)" />
        <Item href="/Mechanics/Mounts/Skins/Lions/WhiteLion.(MountSkin).xdb#xpointer(/gameMechanics.constructor.schemes.mount.MountSkin)" />
        <Item href="/Mechanics/Mounts/Skins/Lions/WinterLion.(MountSkin).xdb#xpointer(/gameMechanics.constructor.schemes.mount.MountSkin)" />
        <Item href="/Mechanics/Mounts/Skins/Lions/LionItemMall.(MountSkin).xdb#xpointer(/gameMechanics.constructor.schemes.mount.MountSkin)" />
        <Item href="/Mechanics/Mounts/Skins/TkaRika/TkaRikaLion.(MountSkin).xdb#xpointer(/gameMechanics.constructor.schemes.mount.MountSkin)" />
        <Item href="/Mechanics/Mounts/Skins/Demon/DemonLion.(MountSkin).xdb#xpointer(/gameMechanics.constructor.schemes.mount.MountSkin)" />
        <Item href="/Mechanics/Mounts/Skins/Hero/HeroLion.(MountSkin).xdb#xpointer(/gameMechanics.constructor.schemes.mount.MountSkin)" />
        <Item href="/Mechanics/Mounts/Skins/Golden/GoldenLion.(MountSkin).xdb#xpointer(/gameMechanics.constructor.schemes.mount.MountSkin)" />
    </alternativeSkins>
So, "basicScin" is responsible for the basic skin of the mount, which is issued after activating the item of the mount. And "alternativeSkins" are responsible for the skins we can get on our mount.
It is in "alternativeSkins" that we need to add our new skin.
Because in xdb files mountresource most often refers to SkinListResourse which doesn't work on version 4.0 (at least for me). We will have to find it in the folder with new xdb from version 7.0 or 8.0.
Opening it and comparing it with the original, we will find the skins we need.
XML:
<skins>
        <Item href="/Mechanics/Mounts/Skins/Lions/BlackLion.(MountSkin).xdb#xpointer(/gameMechanics.constructor.schemes.mount.MountSkin)"/>
        <Item href="/Mechanics/Mounts/Skins/Lions/FireLion.(MountSkin).xdb#xpointer(/gameMechanics.constructor.schemes.mount.MountSkin)"/>
        <Item href="/Mechanics/Mounts/Skins/Lions/WhiteLion.(MountSkin).xdb#xpointer(/gameMechanics.constructor.schemes.mount.MountSkin)"/>
        <Item href="/Mechanics/Mounts/Skins/Lions/WinterLion.(MountSkin).xdb#xpointer(/gameMechanics.constructor.schemes.mount.MountSkin)"/>
        <Item href="/Mechanics/Mounts/Skins/Lions/LionItemMall.(MountSkin).xdb#xpointer(/gameMechanics.constructor.schemes.mount.MountSkin)"/>
        <Item href="/Mechanics/Mounts/Skins/TkaRika/TkaRikaLion.(MountSkin).xdb#xpointer(/gameMechanics.constructor.schemes.mount.MountSkin)"/>
        <Item href="/Mechanics/Mounts/Skins/Demon/DemonLion.(MountSkin).xdb#xpointer(/gameMechanics.constructor.schemes.mount.MountSkin)"/>
        <Item href="/Mechanics/Mounts/Skins/Hero/HeroLion.(MountSkin).xdb#xpointer(/gameMechanics.constructor.schemes.mount.MountSkin)"/>
        <Item href="/Mechanics/Mounts/Skins/Golden/GoldenLion.(MountSkin).xdb#xpointer(/gameMechanics.constructor.schemes.mount.MountSkin)"/>
        <Item href="/Mechanics/Mounts/Skins/Lions/AnniversaryLion.(MountSkin).xdb#xpointer(/gameMechanics.constructor.schemes.mount.MountSkin)"/>
        <Item href="/Mechanics/Mounts/Skins/Lions/LionDead.(MountSkin).xdb#xpointer(/gameMechanics.constructor.schemes.mount.MountSkin)"/>
</skins>
The last two lines are exactly what we need. We add them to the server and client parts of MounResource and in the end we get something like this.
XML:
<alternativeSkins>
        <Item href="/Mechanics/Mounts/Skins/Lions/BlackLion.(MountSkin).xdb#xpointer(/gameMechanics.constructor.schemes.mount.MountSkin)" />
        <Item href="/Mechanics/Mounts/Skins/Lions/WhiteLion.(MountSkin).xdb#xpointer(/gameMechanics.constructor.schemes.mount.MountSkin)" />
        <Item href="/Mechanics/Mounts/Skins/Lions/WinterLion.(MountSkin).xdb#xpointer(/gameMechanics.constructor.schemes.mount.MountSkin)" />
        <Item href="/Mechanics/Mounts/Skins/Lions/LionItemMall.(MountSkin).xdb#xpointer(/gameMechanics.constructor.schemes.mount.MountSkin)" />
        <Item href="/Mechanics/Mounts/Skins/TkaRika/TkaRikaLion.(MountSkin).xdb#xpointer(/gameMechanics.constructor.schemes.mount.MountSkin)" />
        <Item href="/Mechanics/Mounts/Skins/Demon/DemonLion.(MountSkin).xdb#xpointer(/gameMechanics.constructor.schemes.mount.MountSkin)" />
        <Item href="/Mechanics/Mounts/Skins/Hero/HeroLion.(MountSkin).xdb#xpointer(/gameMechanics.constructor.schemes.mount.MountSkin)" />
        <Item href="/Mechanics/Mounts/Skins/Golden/GoldenLion.(MountSkin).xdb#xpointer(/gameMechanics.constructor.schemes.mount.MountSkin)" />
        <Item href="/Mechanics/Mounts/Skins/Lions/AnniversaryLion.(MountSkin).xdb#xpointer(/gameMechanics.constructor.schemes.mount.MountSkin)" />
        <Item href="/Mechanics/Mounts/Skins/Lions/LionDead.(MountSkin).xdb#xpointer(/gameMechanics.constructor.schemes.mount.MountSkin)" />
</alternativeSkins>
*continue in the next post as there is a limitation on images*
Last edited:
