Allods 1.1.02.0 Server Setup
All files
OR
Separate links
PostgreSQL 9.2.13-1 [WINDOWS x64]
You do not have permission to view link
Log in or register now.
OR
Separate links
You do not have permission to view link
Log in or register now.
You do not have permission to view link
Log in or register now.
You do not have permission to view link
Log in or register now.
PostgreSQL 9.2.13-1 [WINDOWS x64]
You do not have permission to view link
Log in or register now.
You do not have permission to view link
Log in or register now.
You do not have permission to view link
Log in or register now.
Install required java version linked in 0. Get the required files , Add an Environment variable in System Variables by pressing NEW and adding JAVA_HOME as a Variable name and path to Java folder as Value


Install Normally REMEMBER THE PASSWORD , check open stack builder and after selecting your Postgresql server download pgJDBC and psqlODBC and go through installation (errors might show up but it didn't halt my server from running)

open pgadmin, use your password to login into your server and right click databases > Create database and name it ao_account_trunk16


open pgadmin, use your password to login into your server and right click databases > Create database and name it ao_account_trunk16

Install the provided version of wamp normally and extract the wamp.rar into the wamp main directory

left click wamp icon and open php.ini

look for Paths and Directories and paste this path right under it
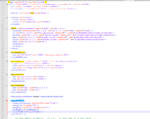
include_path = ".;C:\wamp\allods\hessian;C:\wamp\allods\hessianPhpPatch;C:\wamp\allods\j2php"
it should look like this
 With wamp running head over to

and add these databases one by

left click wamp icon and open php.ini

look for Paths and Directories and paste this path right under it
include_path = ".;C:\wamp\allods\hessian;C:\wamp\allods\hessianPhpPatch;C:\wamp\allods\j2php"
it should look like this

You do not have permission to view link
Log in or register now.
and open database taband add these databases one by
Code:
allods_online_auction_trunk_10
    allods_online_billing_trunk_rc2
    allods_online_guild_trunk_6
    allods_online_mail_rc_1_1_02
    allods_online_masterserver_trunk
allods_online_rc_1_1_02with wamp open go to \server_bin\accountServer\cfg edit shard_local edit password to what you set your Postgresql to leave blank if there no password (example mine is 1234 here)

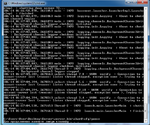
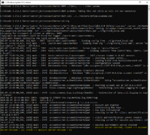
Test run startAccountServer.bat inside server_bin\accountServer if successful it should state
account server started, client <-> account server version = 22, shard <-> account server version = 13
if not check if you got the password right (remember it needs the one set back when installing Postgresql)

with wamp open and startAccountServer.bat running head to C:\wamp\www\php and edit accountExample.php
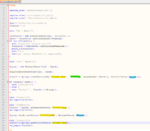
edit your desired account name and password and make sure AccountStatus is set to ACTIVE
go to
if successful you should see SUCCESS at the far end of the page

Ref for accountexample.php:

edit your desired account name and password and make sure AccountStatus is set to ACTIVE
go to
You do not have permission to view link
Log in or register now.
to create your accountif successful you should see SUCCESS at the far end of the page

Ref for accountexample.php:
PHP:
<?php

require_once( 'HessianClient.php' );

require_once('./accountApi.inc.php');
require_once('./ServerVersion.inc.php');

$url = 'http://127.0.0.1:9337';
$version = 8;

echo "URL = $url\n";

$serverVer = new ServerVersion($url, 'AccountAPI');
$path = $serverVer->getVersionPath($version);
if (is_null($path)) {
  echo "Supported versions are:\n";
  $versions = $serverVer->getSupportedVersions();
  print_r($versions);
  echo "\n";
  die("api version $version not supported");
}

echo "Path = $path\n";

$proxy = new HessianClient($url . $path);

registerAccountMethods($url . $path);

$result = $proxy->createAccountEx('ACCOUNT_NAME', 'PASSWORD', AccessLevel::Master(), AccountStatus::Active());

if ($result->isOk()) {
  echo "Created!\n";
} else {
  echo "Failed! " . $result->toString();
}

echo "\nDEBUG\n";
var_export($result);

echo "\nDEBUG\n";
$result = $proxy->getAccountStatus('ACCOUNT_NAME');
var_export($result);

$proxy->setAccountStatus('ACCOUNT_NAME', AccountStatus::Active());

echo "\nDEBUG\n";
$result = $proxy->getAccountStatus('ACCOUNT_NAME');
var_export($result);

?>You should only edit your shard_local.xml located inside \server_bin\masterServer\cfg only if you added a password to wamp if you didnt then leave blank
open BIMHelper.zip
extract XDB_ItemMall.Server.pak inside \game\data\Packs
extract billingServer and itemMallServer folders inside \server_bin
extract allods_online_billing_trunk_rc2.sql in \server_bin\billingServer
run startbilingServerCommon.bat in \server_bin\billingServer
run startitemMallServerCommon.bat in \server_bin\itemMallServer
head to

choose import option and import allods_online_billing_trunk_rc2.sql
after executing you should see this

if not then make sure you are running billing and item mall bats
you need to restart them both after import so you see the changes apply (no need to restart shard)
extract XDB_ItemMall.Server.pak inside \game\data\Packs
extract billingServer and itemMallServer folders inside \server_bin
extract allods_online_billing_trunk_rc2.sql in \server_bin\billingServer
run startbilingServerCommon.bat in \server_bin\billingServer
run startitemMallServerCommon.bat in \server_bin\itemMallServer
head to
You do not have permission to view link
Log in or register now.
and open allods_online_billing_trunk_rc2 database 
choose import option and import allods_online_billing_trunk_rc2.sql

after executing you should see this
if not then make sure you are running billing and item mall bats
you need to restart them both after import so you see the changes apply (no need to restart shard)
inside \server_bin\shard\cfg
there are 2 files: all_maps.cfg and maps.cfg
all_maps.cfg is where you'll find reference to all maps inside the files
maps.cfg is where we put the maps we want to run in our current session not all maps need to be running for the server to run. you need 16gb of ram allocated to the server to run all maps in this version.
a simple copy of the maps you want to run from all_maps to maps will make the maps copied available
if you want to allocate more ram to your server simply edit the highlighted value in startServerDefault.bat

Last edited by a moderator:
-
5
-
4
- Show all

